Projection Mapping
A projection mapping pattern is a reusable container of named surfaces. Each surface gets its own source — any pattern, image or video — and its own warped corners, so one library entry can dress several walls, objects, or screens at once.
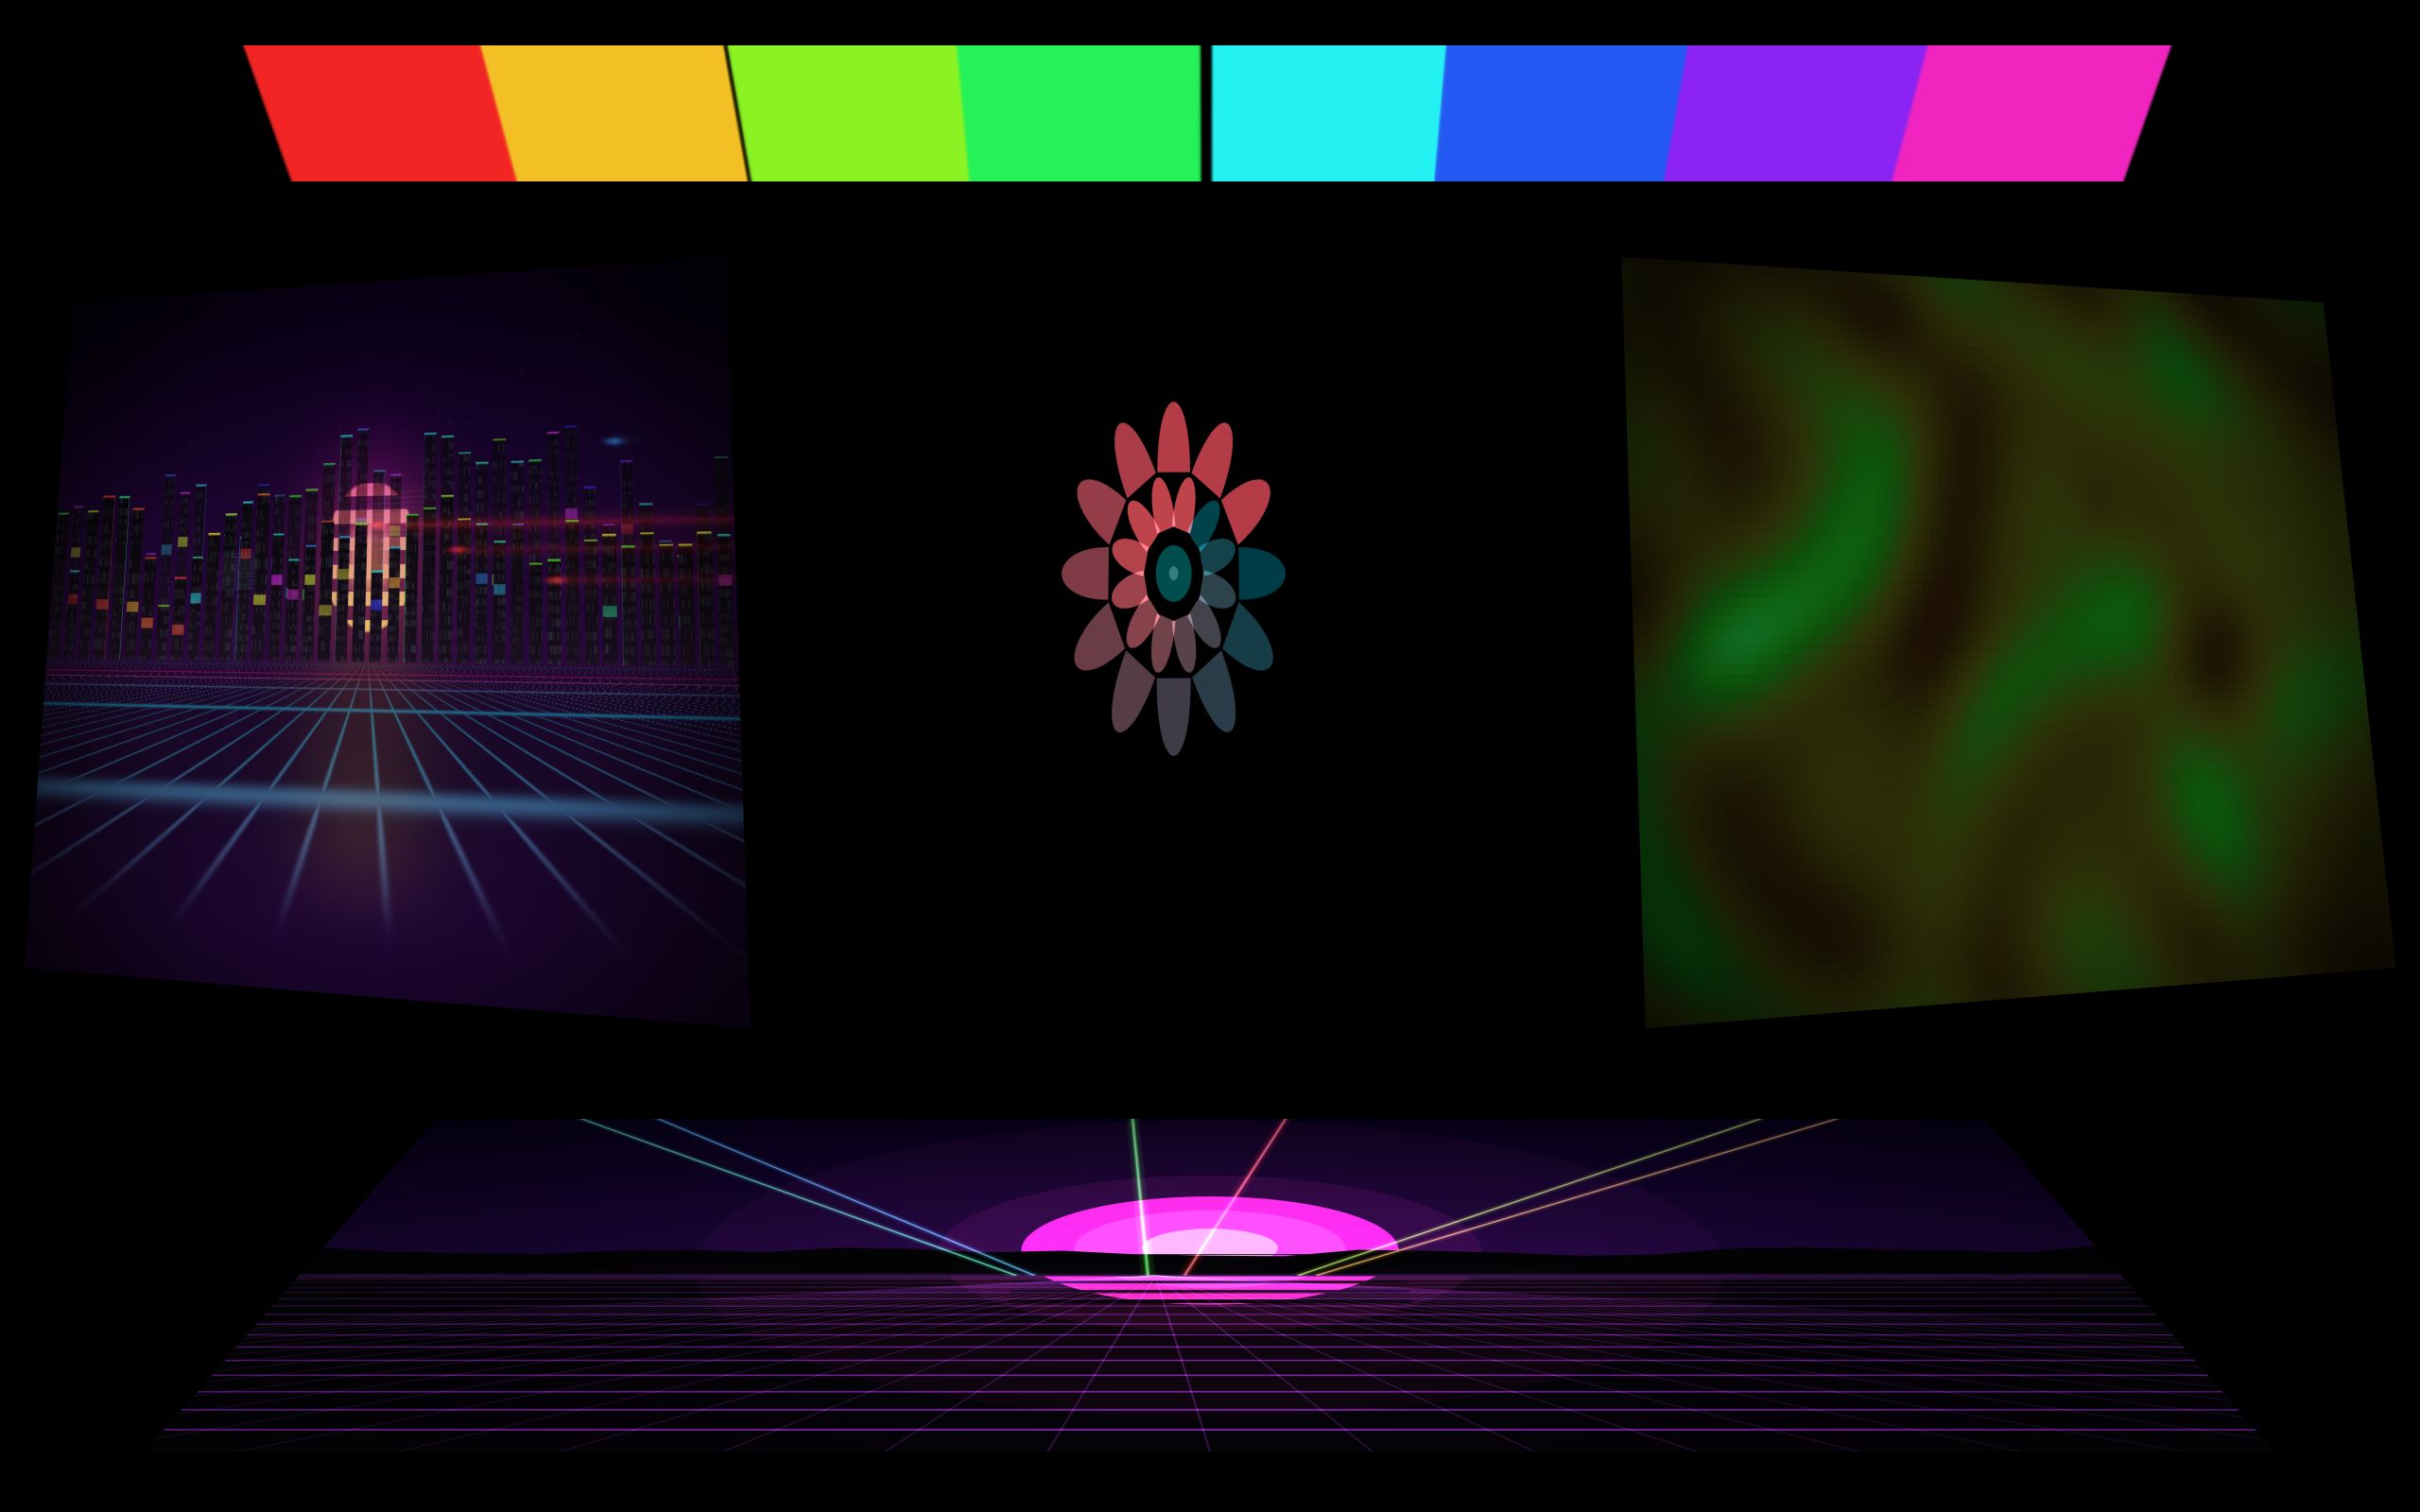
Creating a pattern and adding a mapping
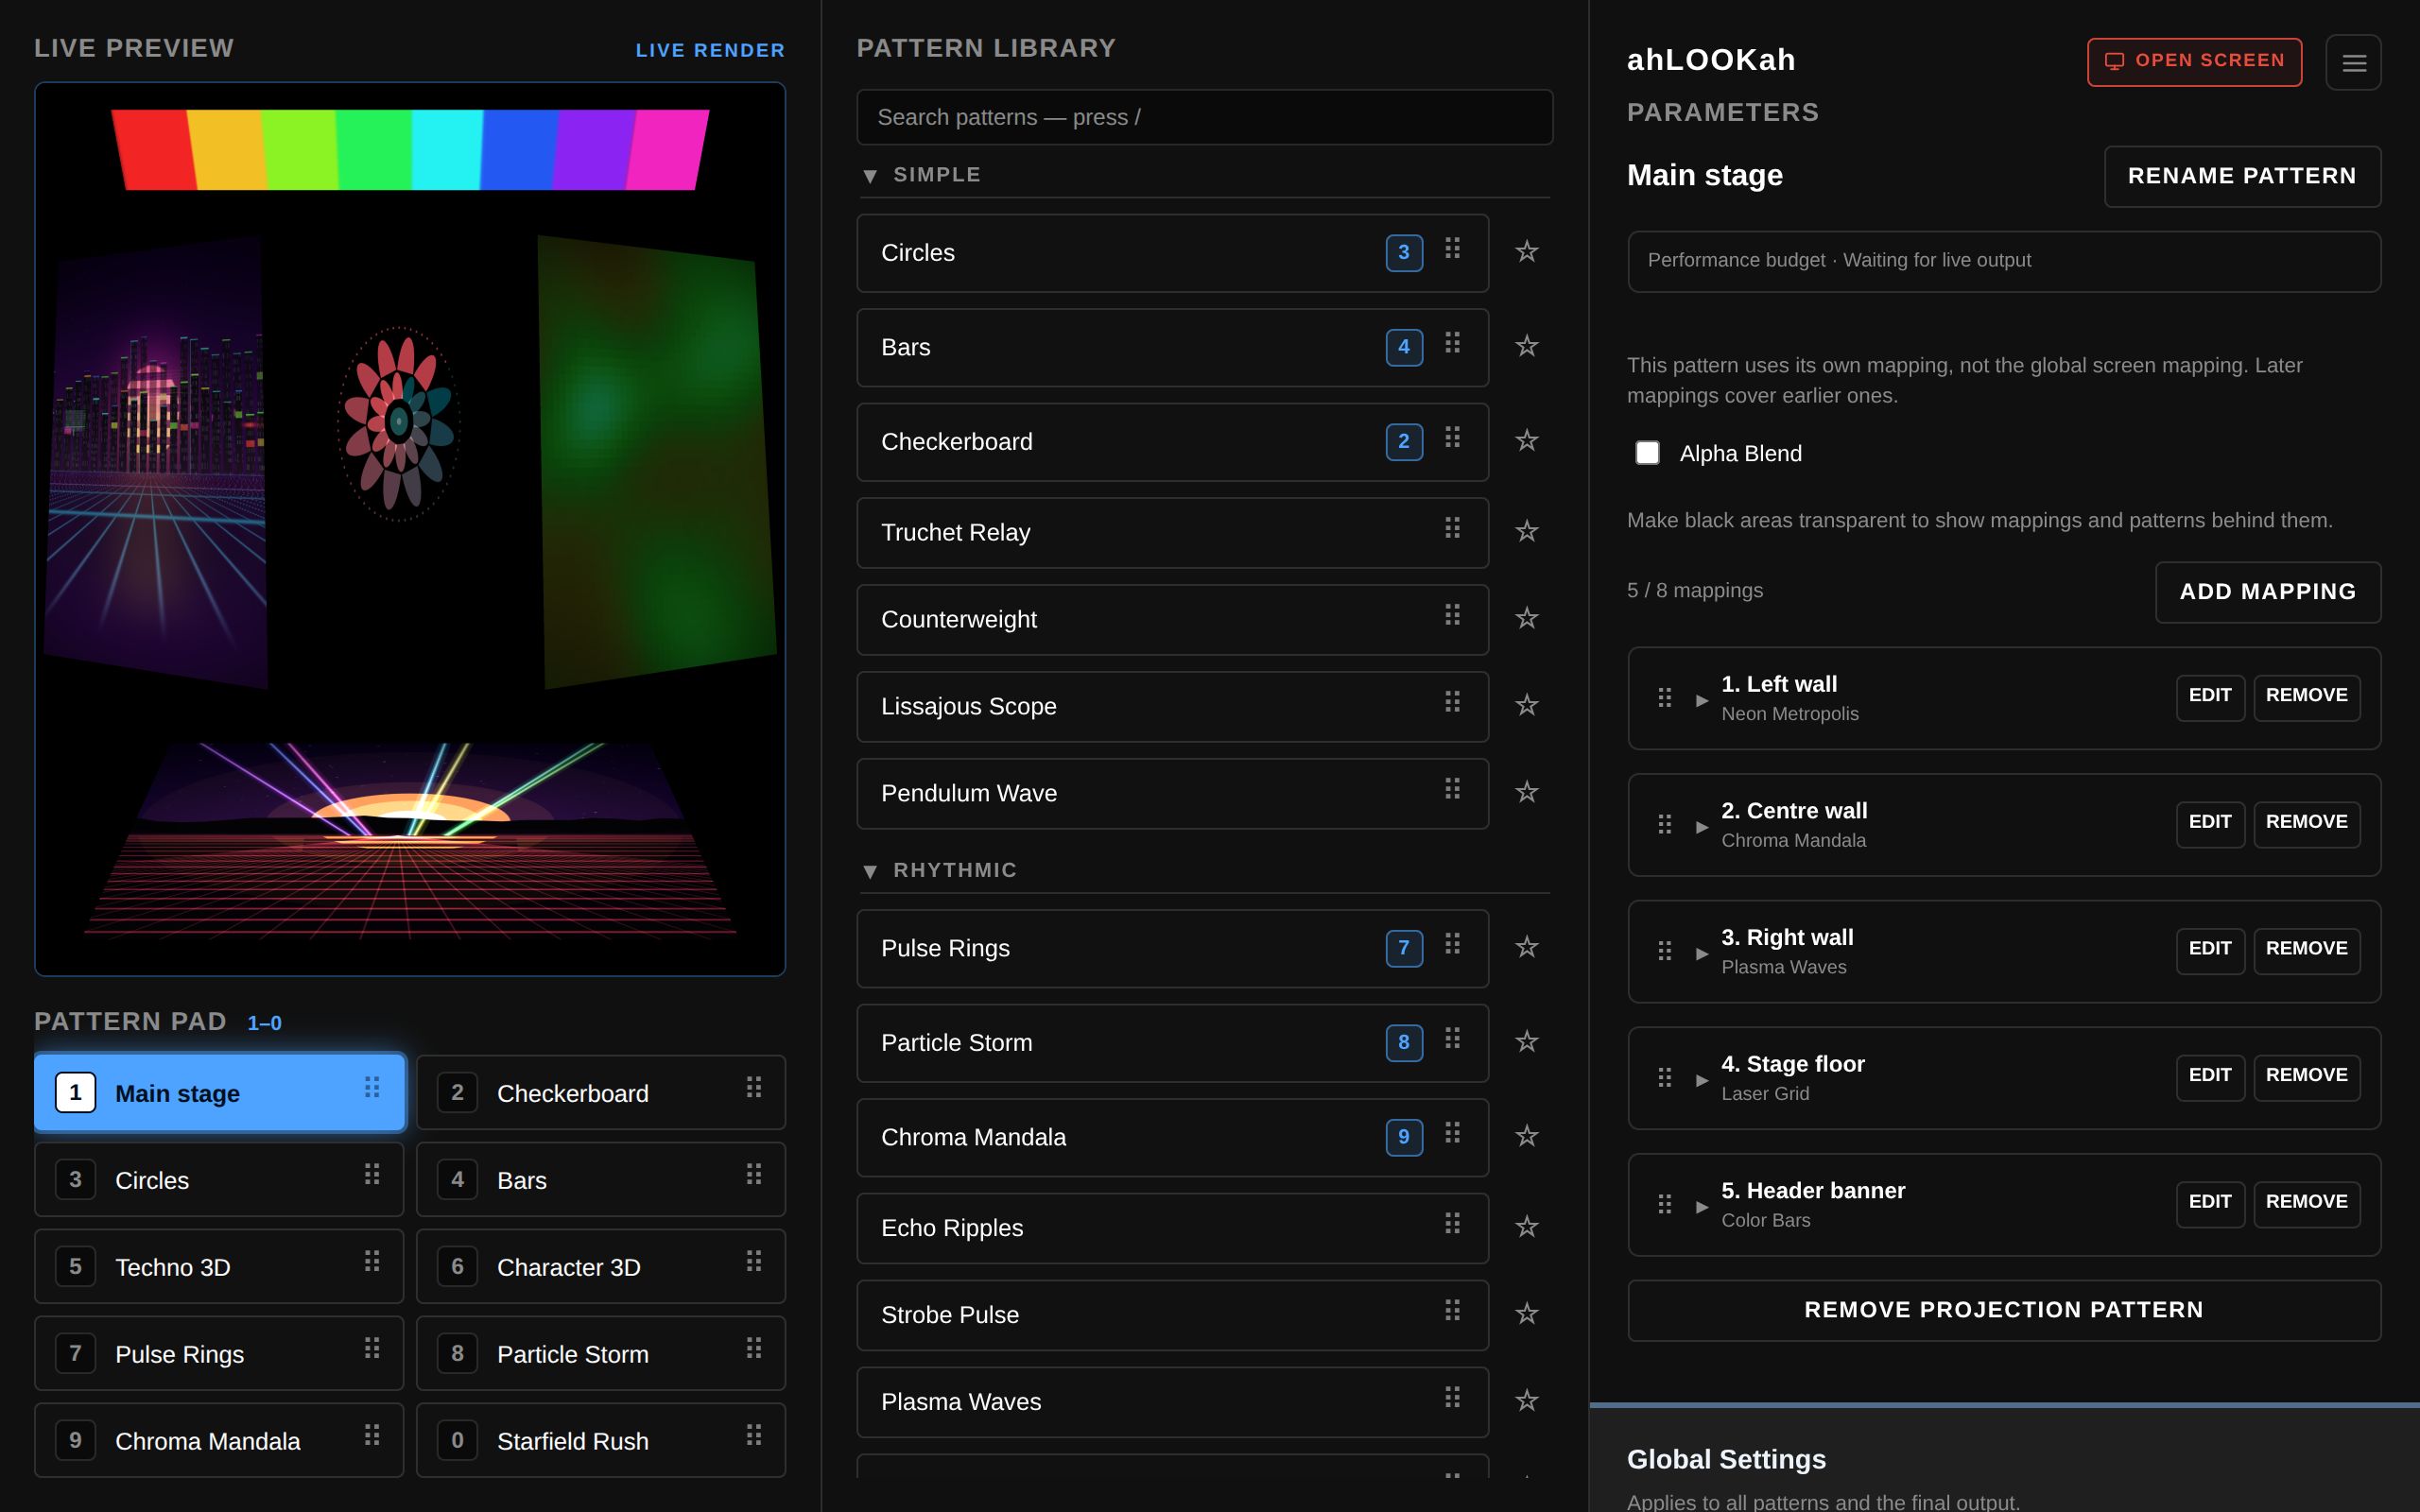
- In the pattern library, open the Projection Mapping group and click ADD.
- Name the pattern — for example, Main stage. It appears in the library like any other pattern and plays on the output when selected.
- In the third column, click Add mapping to open the mapping editor.
- Give the mapping a name (for example, Left wall), keep Checkerboard or choose another source, and position its corners.
New mappings default to Checkerboard from the Simple group, because hard squares are the easiest thing to line up against a real edge. A projection pattern can hold up to eight mappings, and the panel shows a running count such as 5 / 8 mappings — add one per wall, prop, or screen. Mapping patterns cannot contain other mapping patterns.
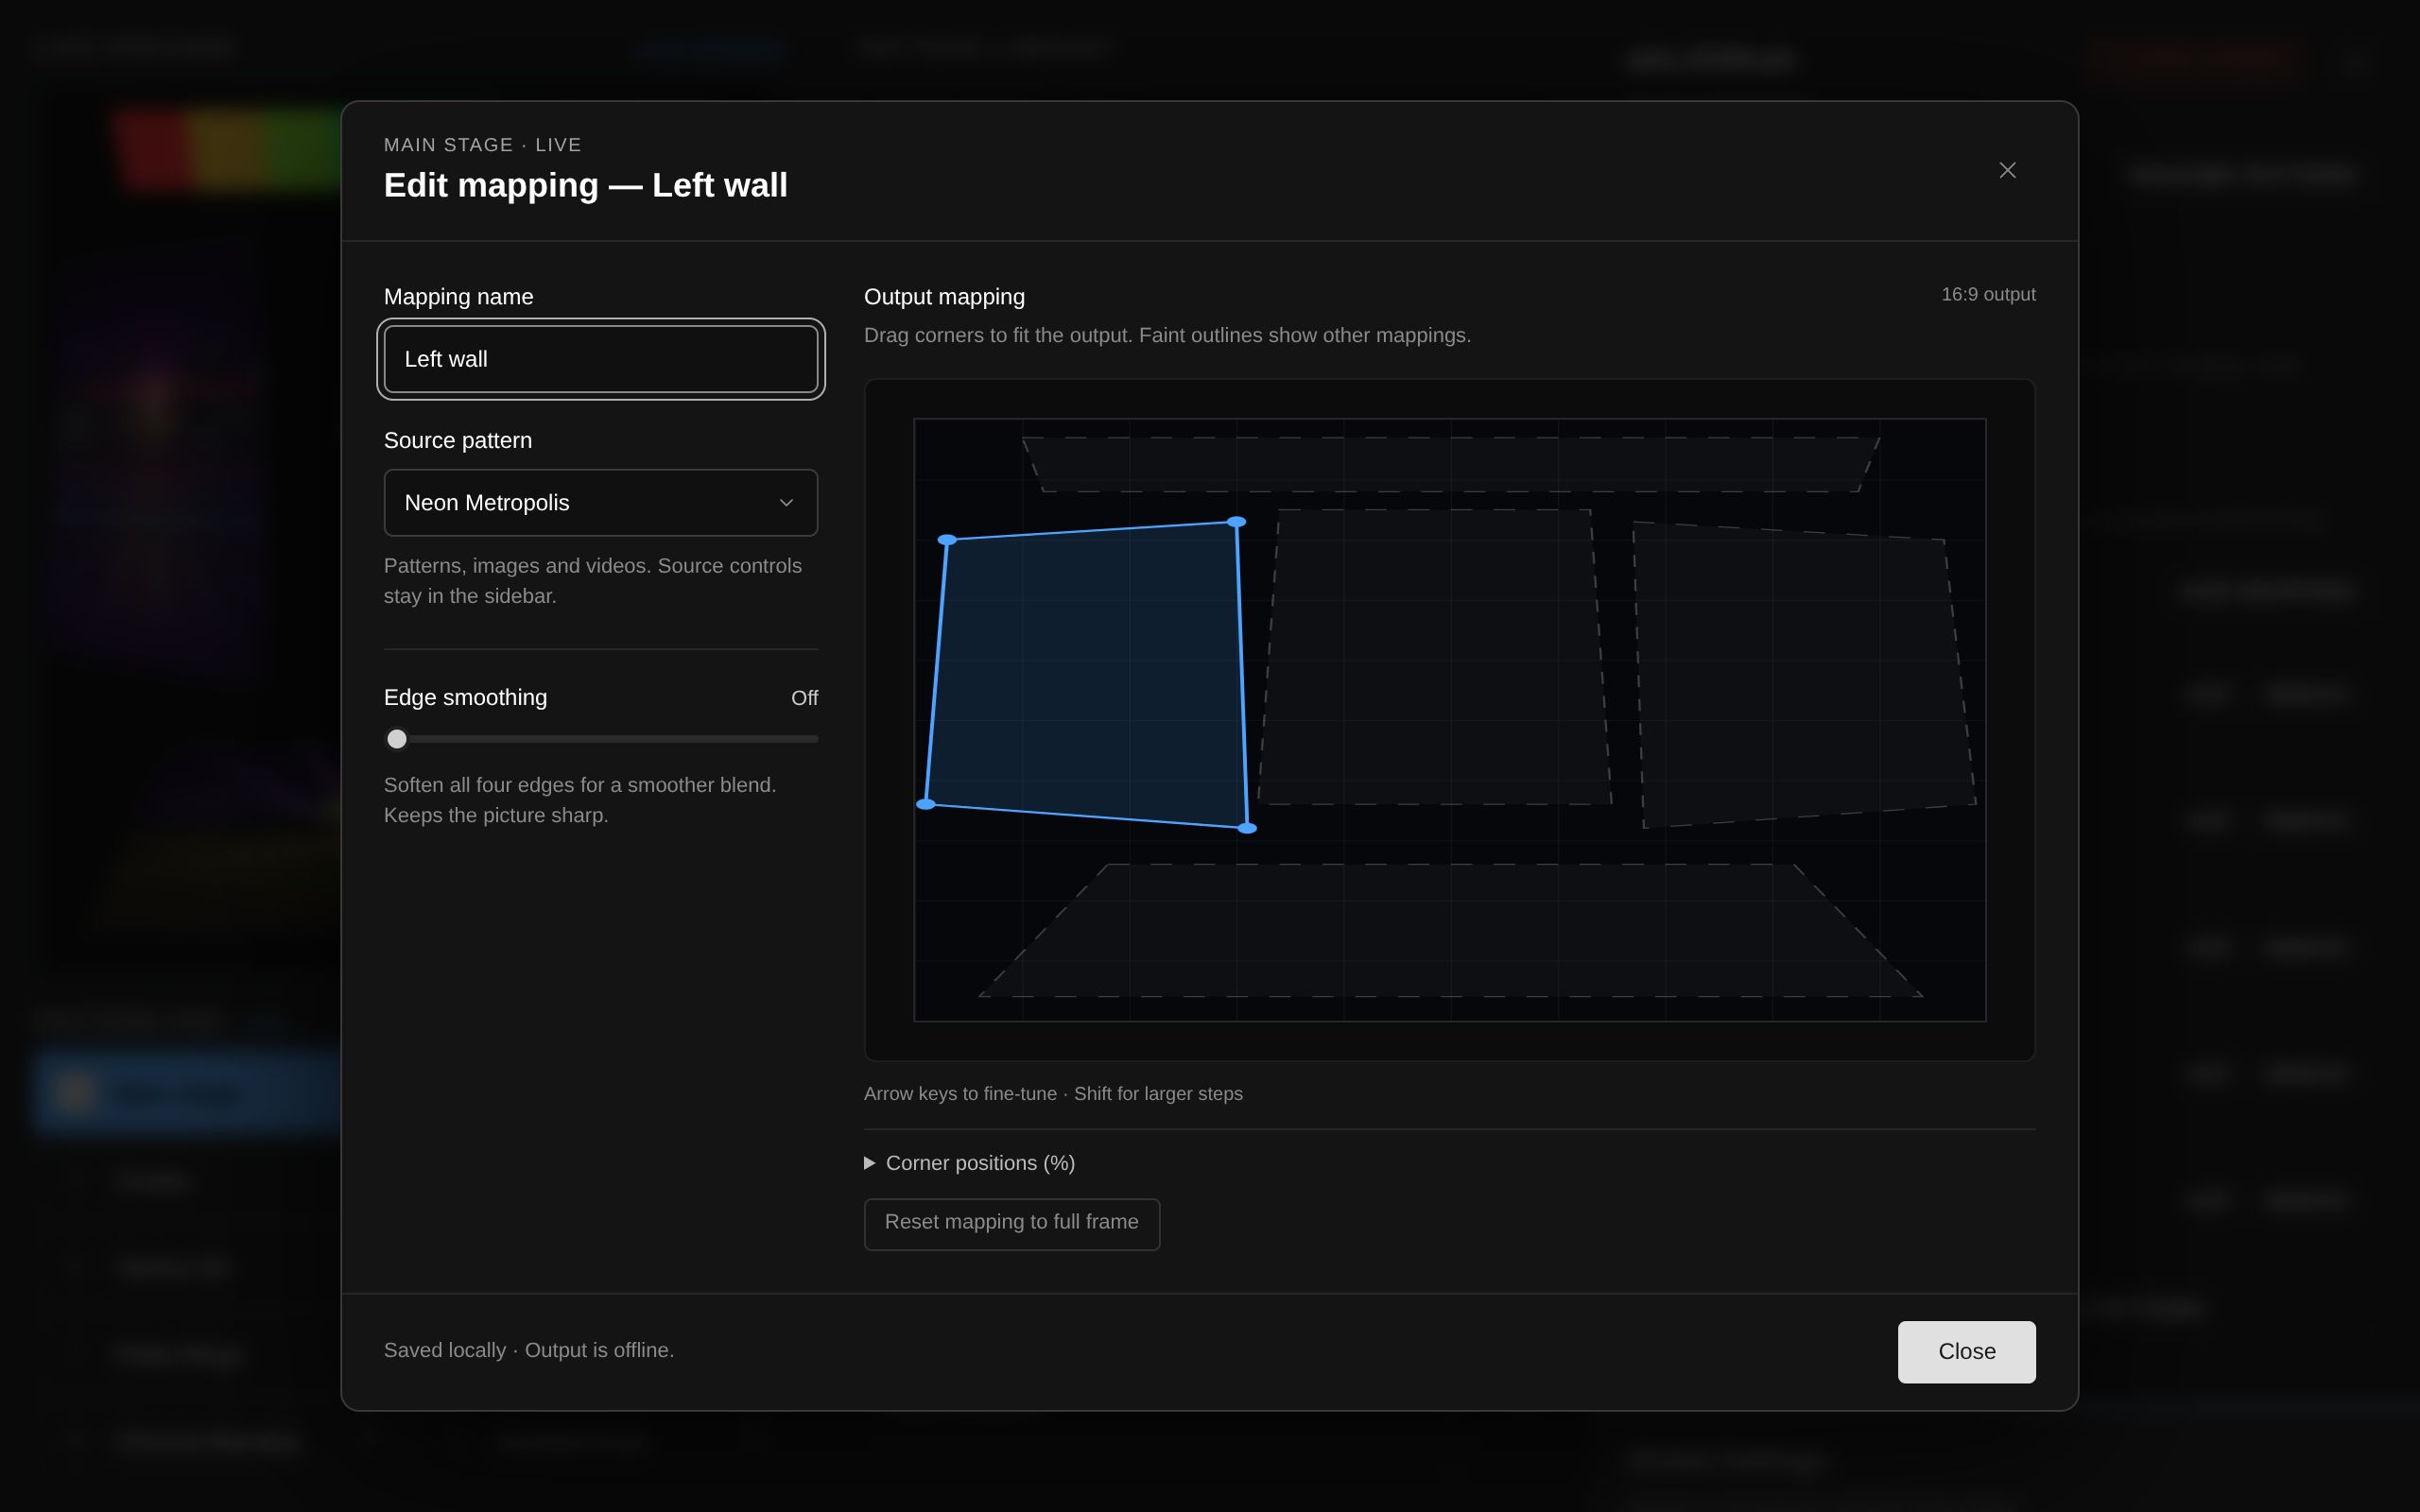
The mapping editor
Each mapping has three things to set — a name, a source, and a position.
- Mapping name — required. A new mapping isn't created until it has a name, and until then the source, edge smoothing and the mapping box stay visibly locked so nothing can be edited into a mapping that never exists.
- Source pattern — a dropdown of every ordinary pattern, grouped by the same categories as the library, plus your loaded images and videos. Camera-input Video FX patterns are valid sources too, but they render on the output only, never in the control preview.
- Edge smoothing — 0–25%; softens all four edges of this mapping only, without blurring the picture. Overlapping mappings blend through their softened edges. It saves with the mapping and survives source changes.
Mapping a pattern: placing the corners
In the Output mapping canvas, drag the four corner handles so the surface sits exactly on its target. Faint dashed outlines show your other mappings, which makes it easy to line up adjacent surfaces without closing the editor.
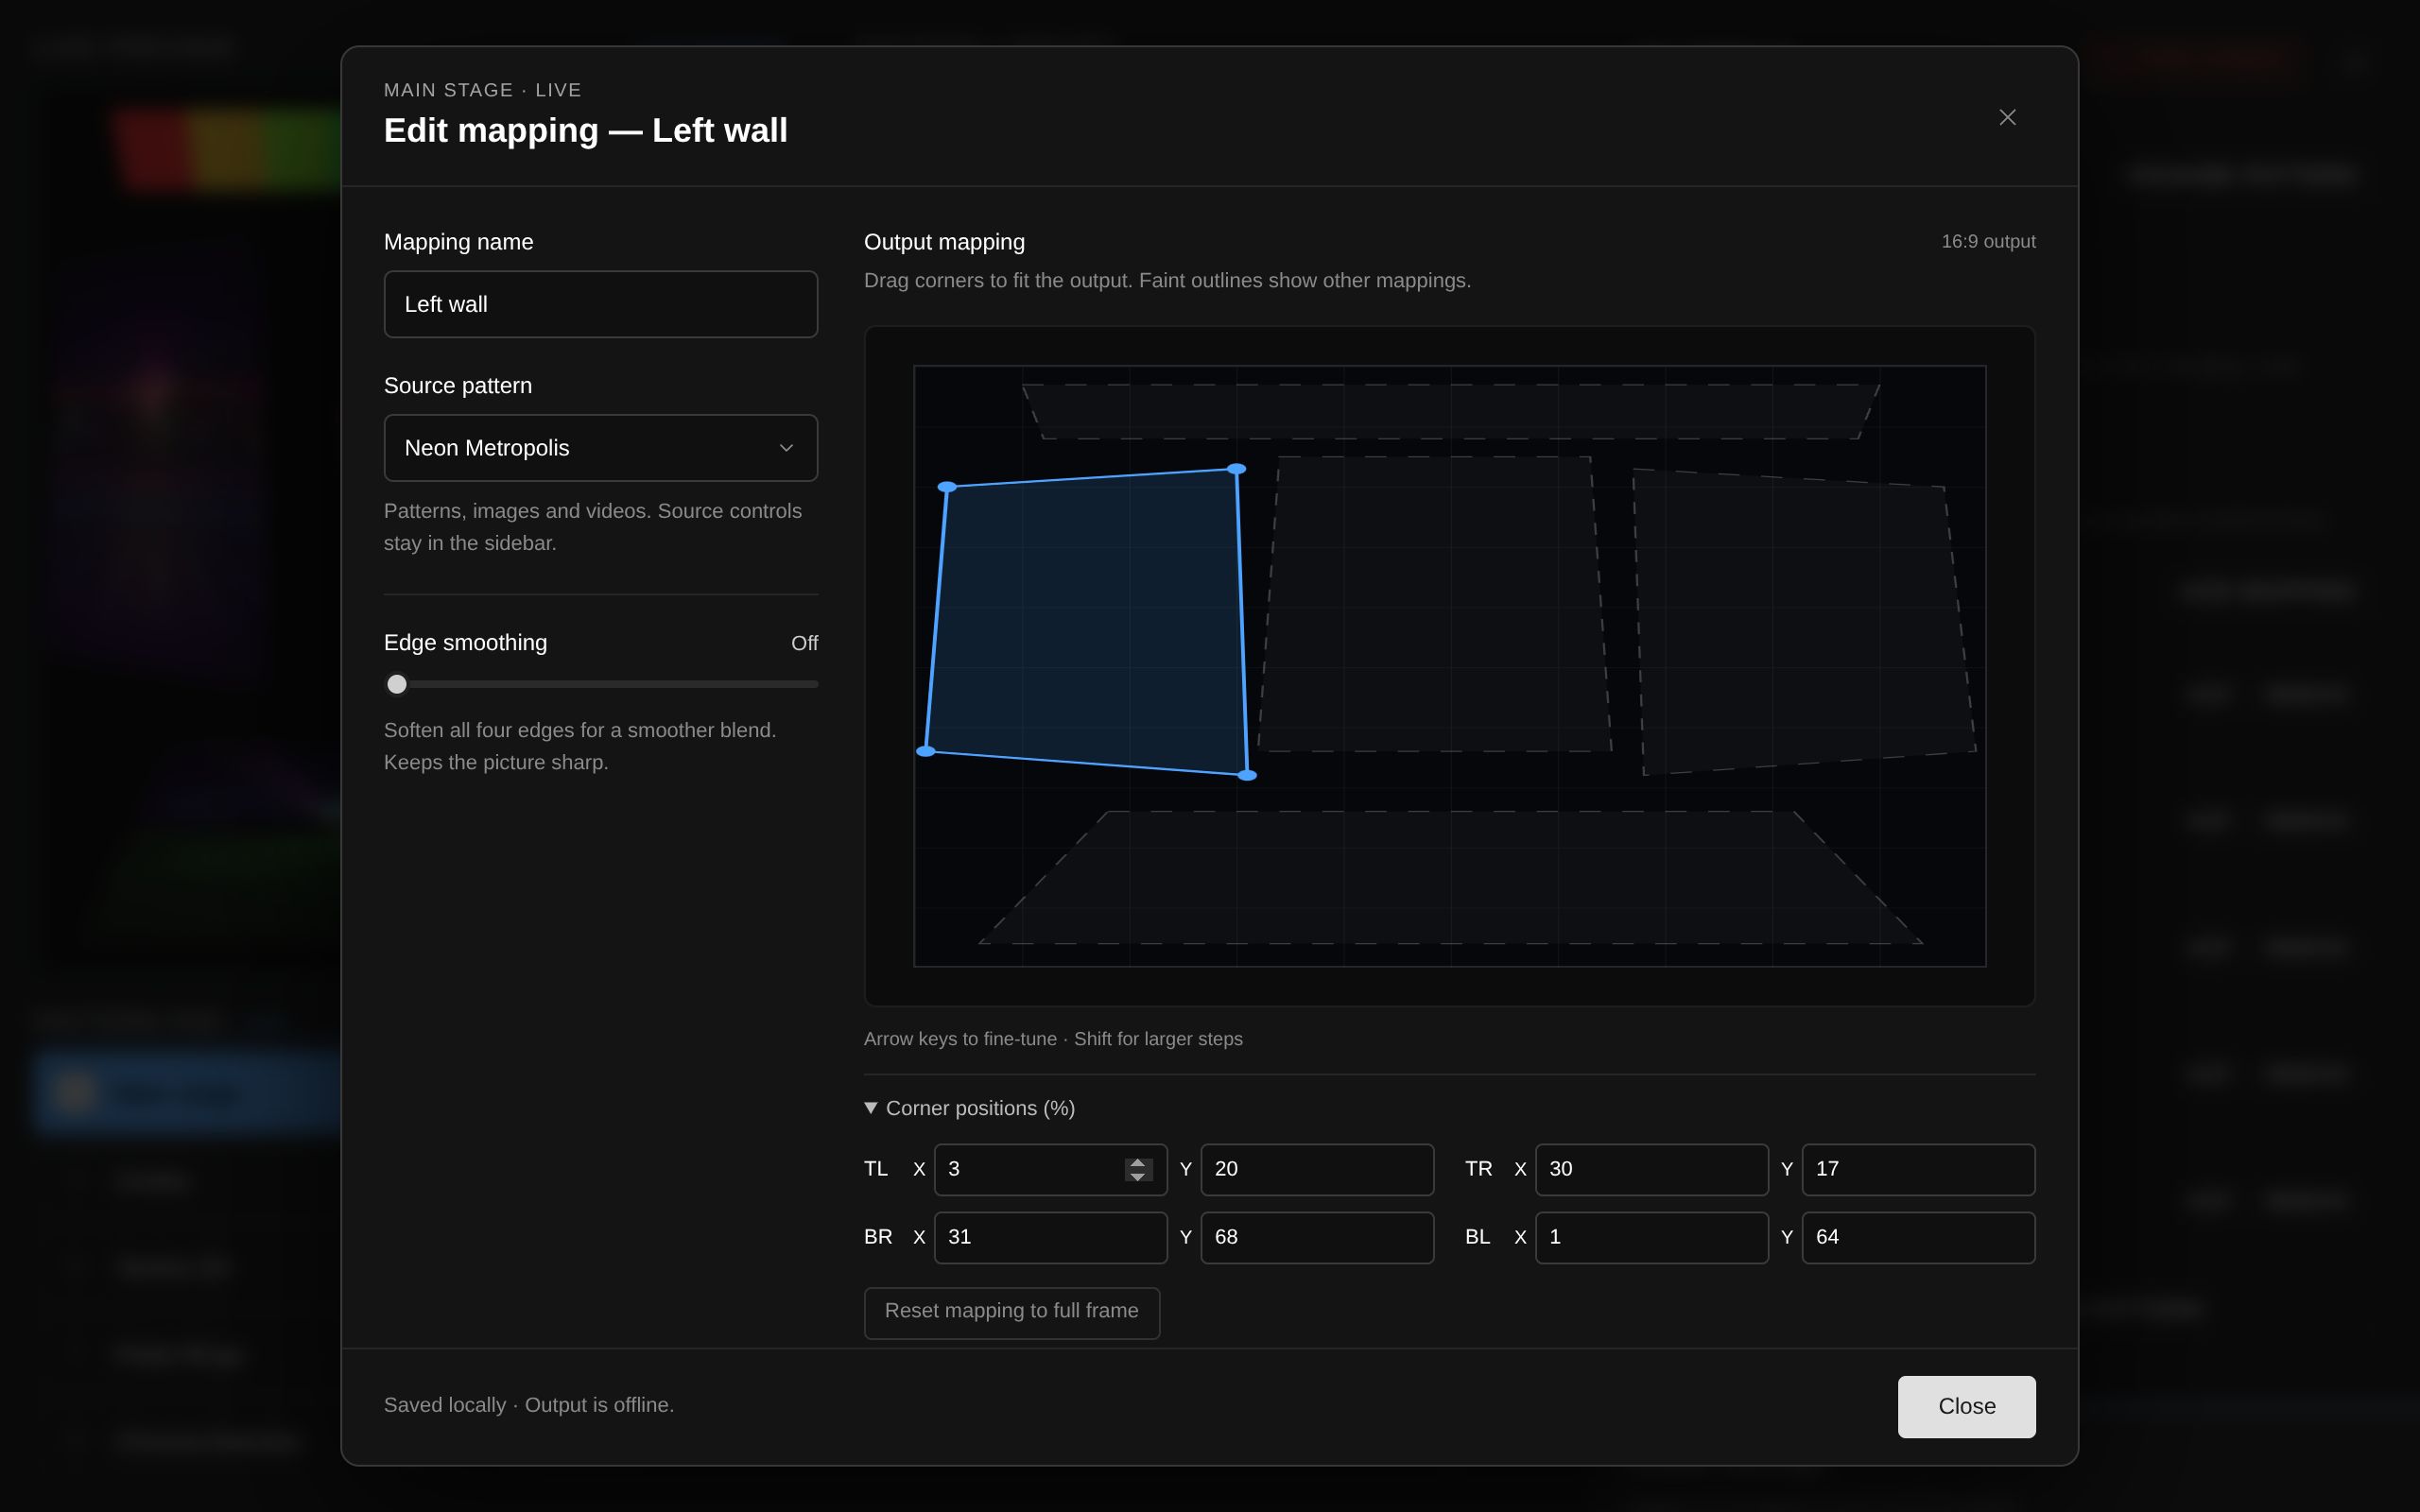
For precision, click a handle and nudge it with the arrow keys — Shift plus an arrow takes larger steps. Open Corner positions (%) to type exact X/Y percentages for TL, TR, BR and BL instead of dragging.
There is no Save button — and no Cancel. Valid name, source, corner and smoothing edits save automatically as you work. Close or Esc closes the editor and keeps everything. If you drag the corners so they cross, the last valid shape is kept and the editor flags the problem instead of applying it.
Managing the surfaces
- Show the controls — click a mapping's title to reveal or hide its source parameters. They're collapsed by default, and each mapping keeps a complete, independent copy of its source's settings even when two mappings share the same source.
- Reorder — drag the ⠿ handle to move a mapping up or down. Later mappings cover earlier ones.
- Remove — each row has Remove, and Remove projection pattern deletes the whole entry from the library.
Swapping a mapping's source by dragging
You don't have to open the editor to change what a surface shows. Drag any pattern from the library — or from the pad — and drop it straight onto a mapping row. The row under the pointer is outlined while you hold the pattern over it.
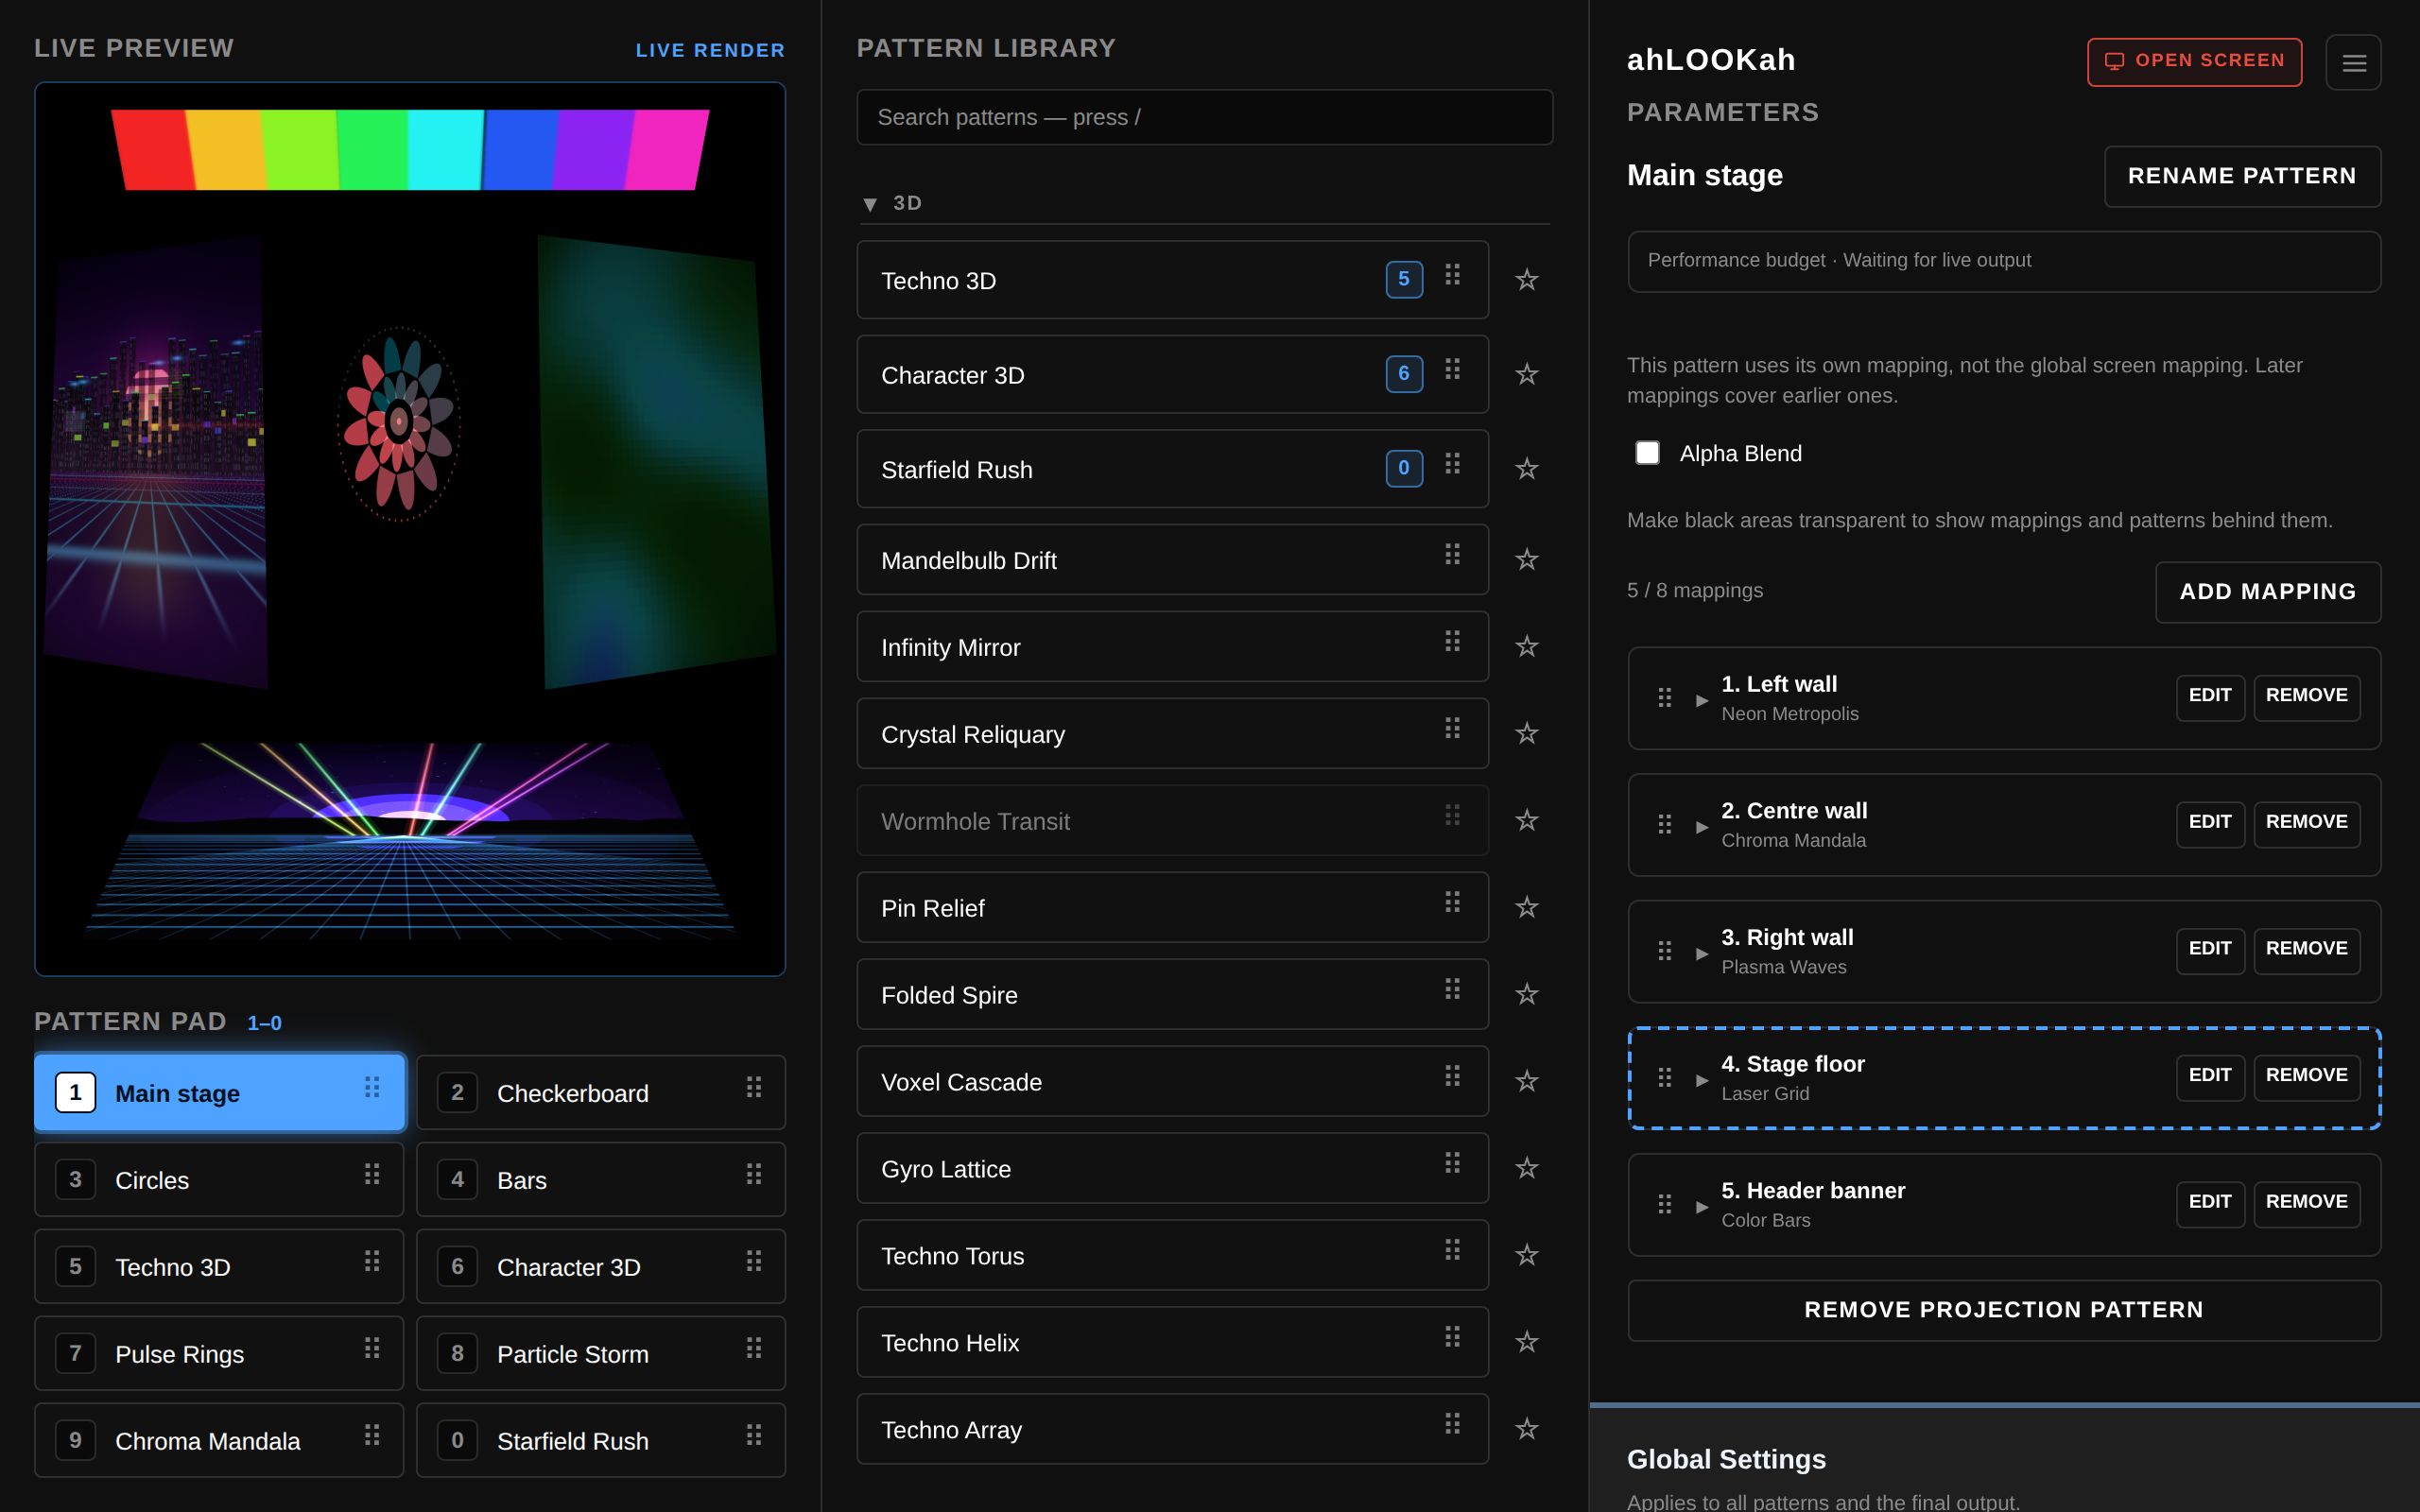
- The row has to be collapsed. A row with its parameters open is not a drop target — click its title to close it first.
- Only the source changes: the mapping keeps its name, its corners, and its edge smoothing.
- The incoming pattern starts from its own current settings and keeps its own controls from then on, so two mappings can share a source without sharing values.
- Dropping the pattern that is already assigned does nothing.
The same drag does different jobs elsewhere: drop a pattern on a pad slot or on the library to assign it there, and drag a mapping's ⠿ handle inside the list to reorder it.
By default, unmapped areas are black and each surface's interior is opaque, so later surfaces hide earlier ones. Overlapping edges blend where edge smoothing is set.
Alpha Blend
Tick Alpha Blend in the projection panel to make black areas transparent. That reveals the mappings underneath and lets the pattern behind show through in a merge, while non-black colours keep their colour and any existing transparency. Unmapped areas become transparent too.
The mask works in the output, the preview, and the CSS fallback, and it combines with edge smoothing. It's off by default and persists with the pattern's parameters, including across layout and source changes and across CUE/TAKE.
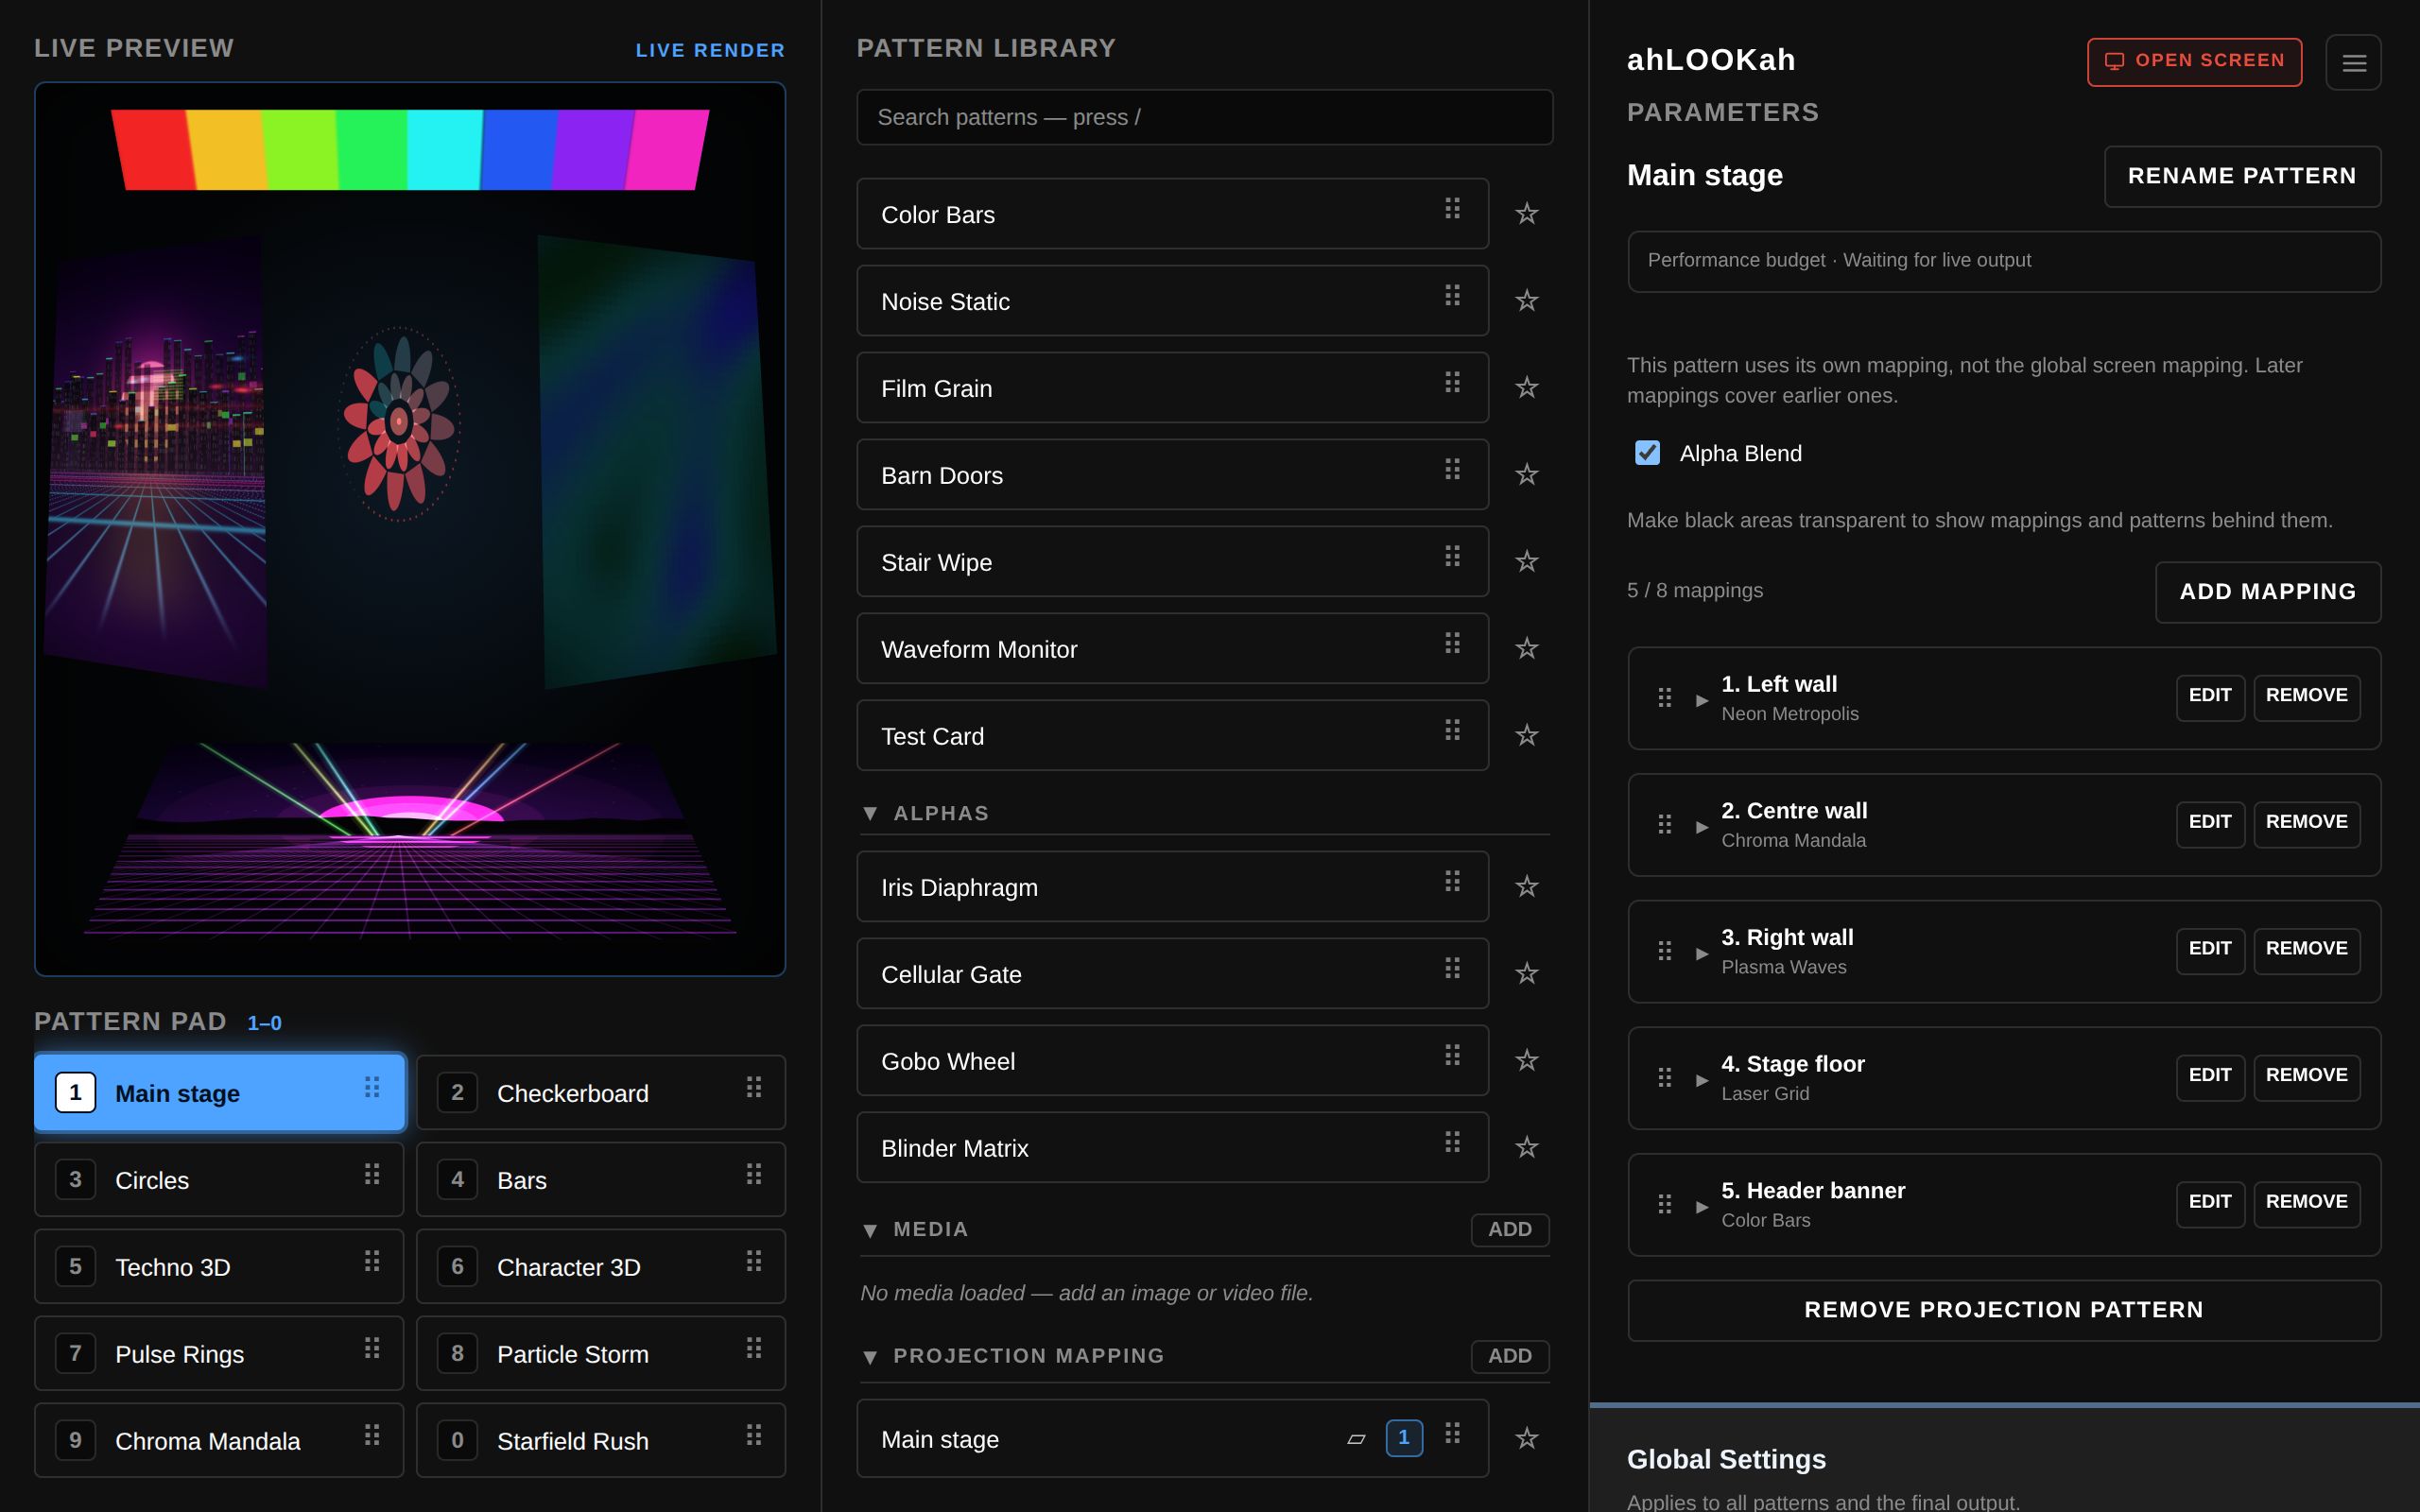
Tip The Alphas library group exists for this mode: three grayscale-on-black mattes — Iris Diaphragm, Cellular Gate, and Blinder Matrix — whose brightness reads as opacity once the black background is keyed out. It is a black key, not a proportional luminance-to-opacity conversion.
Cue mode, saving, and recovery
- Layouts and parameters persist locally and sync across the control and output windows.
- CUE — corners, edge smoothing, and a mapping's source controls can be staged in real time without changing LIVE; Enter (TAKE) applies them atomically. Names, sources, and structure are locked until you finish or cancel CUE.
- If a replacement can't start — the previous output stays intact and the panel offers Retry projection layout (and Retry output inside the editor). Saved edits stay pending on the output until it starts successfully.
- Missing sources — flagged in the editor and rendered black (transparent with Alpha Blend) until you pick a replacement. Files the browser can't read show their permission or missing-file message inside their surface.
Screen mapping vs. projection mapping
They solve different problems and never fight each other:
| Screen Mapping | Projection Mapping | |
|---|---|---|
| Scope | Global — one warp for the whole output | Per pattern — up to eight warps, one per surface |
| Typical use | Keystone a single projector onto a flat screen | Dress several walls, props, or screens with different content |
| Applies to | Ordinary patterns (after blend and post-processing) | Its own surfaces; bypasses the global calibration without deleting it |
In a merge, each input is mapped before the shared blend and post-processing, so an ordinary pattern still uses your saved screen warp and edge blurring while a projection pattern keeps its own geometry. Global post-processing applies to the result either way. Each surface owns a renderer, so reduce the surface count or shader complexity if the projector machine can't keep up — especially while cueing, when a second program is warming up.